前回はPHPで作成した画像の中にテキストを表示するというものでした。
今回は画像の中に図形を描画していきます。
図形を描画する関数には、指定した色を枠だけに適用するものと塗りつぶすものがあります。
filledというワードがついたら基本的に塗りつぶす描画関数だと思って問題ありません。
直線を描画する
imageline関数は直線を描画します。
imageline(GDImage, start_x, start_y, end_x, end_y, color);作成した画像の左上を0として開始位置のx座標とy座標、終点位置のx座標とy座標を直線で結び、色をつけます。
$image = imagecreate(200, 200);

imagecolorallocate($image, 255, 255, 255);
$red = imagecolorallocate($image, 255, 0, 0);

imageline($image, 50, 50, 150, 150, $red);

header("Content-Type: image/png");

imagepng($image);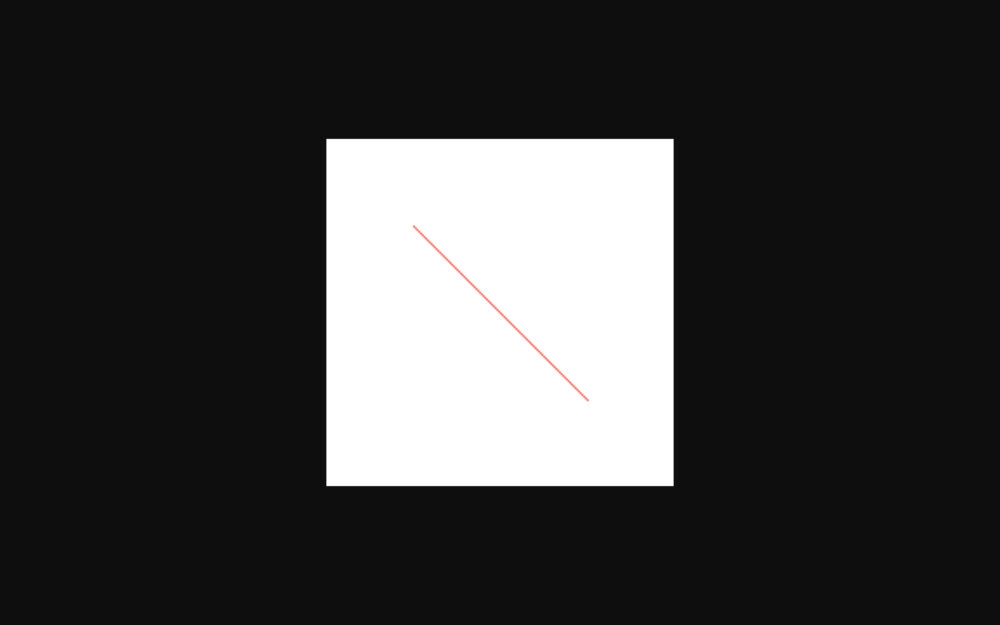
imagedashedline関数を使用すると破線を描画します。
引数に渡せる値はimageline関数と同じです。
この関数は古いため線を装飾する場合は、imagesetstyle関数を使用した方が良いようです。
$image = imagecreate(200, 200);

imagecolorallocate($image, 255, 255, 255);
$red = imagecolorallocate($image, 255, 0, 0);

imagedashedline($image, 50, 50, 150, 150, $red);

header("Content-Type: image/png");

imagepng($image);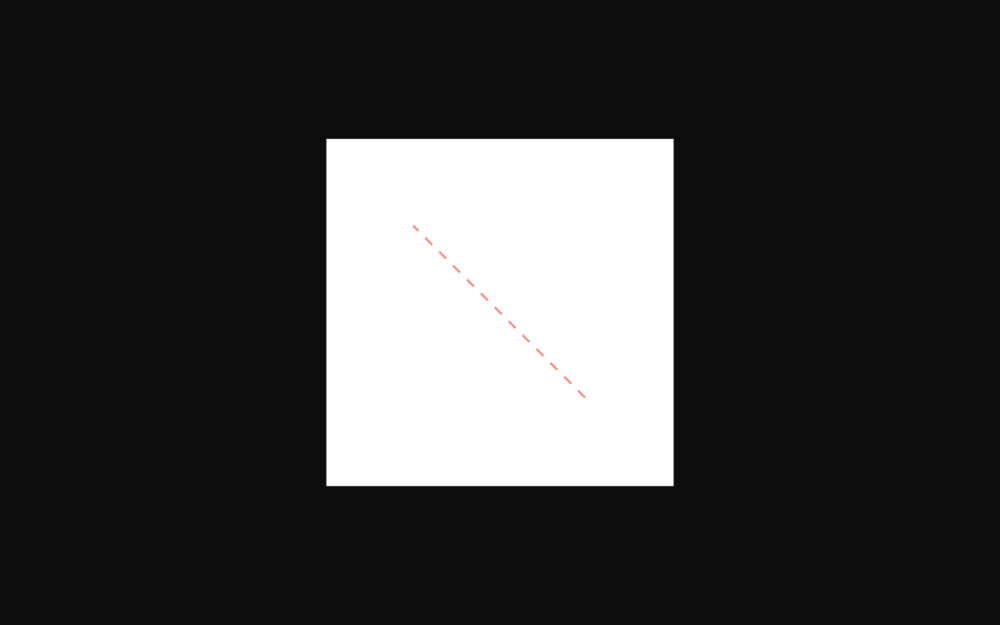
矩形を描画する
矩形を描画するにはimagerectangle関数かimagefilledrectangle関数のどちらかを使用します。
引数に渡せる値は同じです。
imagerectangle(GDImage, top_left_x, top_left_y, bottom_right_x, bottom_right_y, color);
imagefilledrectangle(GDImage, top_left_x, top_left_y, bottom_right_x, bottom_right_y, color);
左上と右下に点を取り描画します。
まずはimagerectangle関数を見てみましょう。
$image = imagecreate(200, 200);

imagecolorallocate($image, 255, 255, 255);
$red = imagecolorallocate($image, 255, 0, 0);

imagerectangle($image, 50, 50, 150, 150, $red);

header("Content-Type: image/png");

imagepng($image);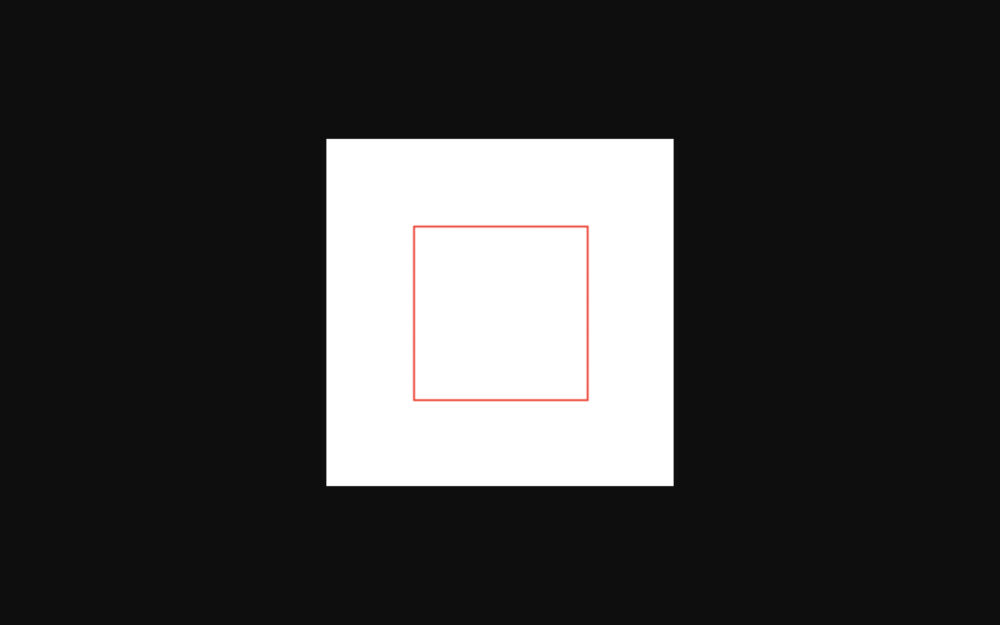
imagefilled関数はこの枠線を含む内側を塗りつぶします。
$image = imagecreate(200, 200);

imagecolorallocate($image, 255, 255, 255);
$red = imagecolorallocate($image, 255, 0, 0);

imagefilledrectangle($image, 50, 50, 150, 150, $red);

header("Content-Type: image/png");

imagepng($image);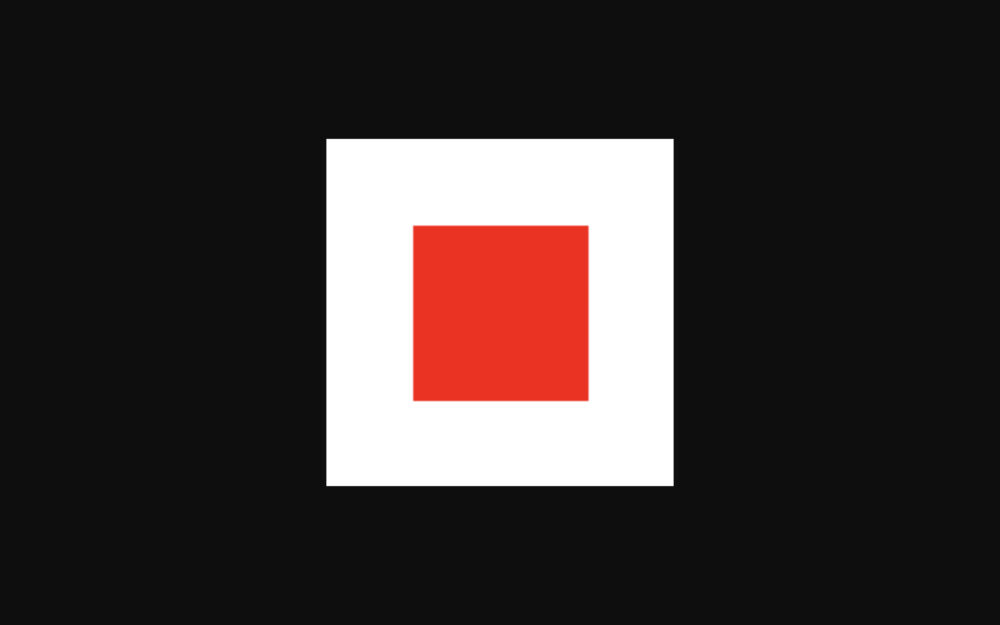
多角形を描画する
多角形を描画するにはimagepolygon関数かimagefilledpolygon関数のどちらかを使用します。
引数に渡せる値は同じです。
imagepolygon(GDImage, points, number, color);
imagefilledpolygon(GDImage, points, number, color);
pointsにはx座標とy座標の配列を渡します。
例えば、(50, 50)、(50, 150)、(150,150)この3点の座標をpointsに渡すには以下のように配列にして渡す必要があります。
[50, 50, 50,150, 150, 150];numberは描画する多角形の頂点の数を指定します。
3以上の値を指定する必要があります。
numberにはpointsの要素数を2で割った数を渡すようにしましょう。
$image = imagecreate(200, 200);

imagecolorallocate($image, 255, 255, 255);
$red = imagecolorallocate($image, 255, 0, 0);

$points = [50, 50, 50, 150, 150, 150];
imagepolygon($image, $points, count($points) / 2, $red);

header("Content-Type: image/png");

imagepng($image);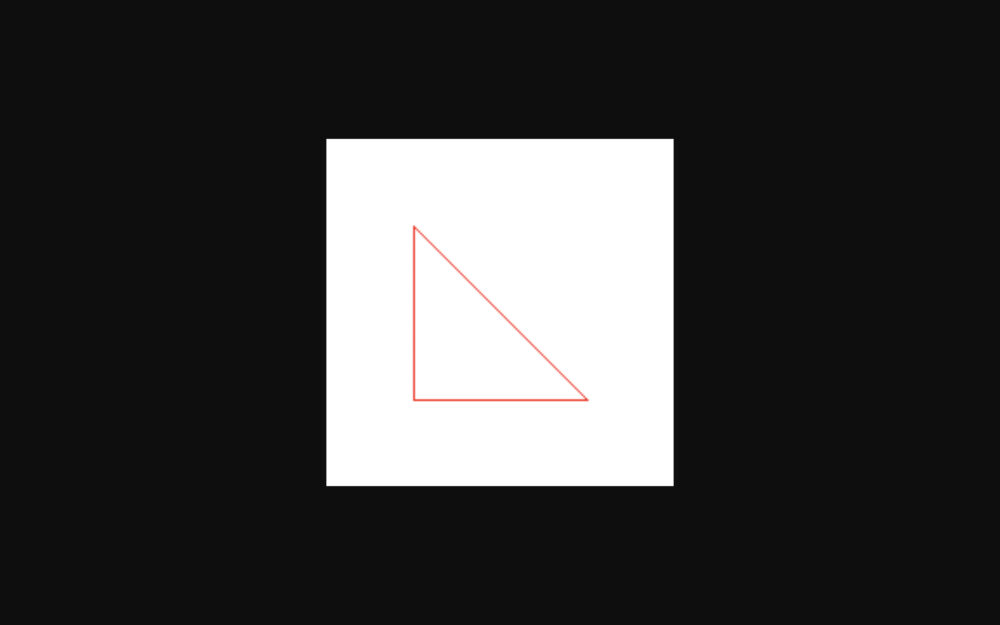
imagefilledpolygon関数を使用するとこのようになります。
$image = imagecreate(200, 200);

imagecolorallocate($image, 255, 255, 255);
$red = imagecolorallocate($image, 255, 0, 0);

$points = [50, 50, 50, 150, 150, 150];
imagefilledpolygon($image, $points, count($points) / 2, $red);

header("Content-Type: image/png");

imagepng($image);
弧(円)を描画する
弧(円)を描画するにはimagearc関数かimagefilledarc関数を使用します。
引数に渡せる値はstyleを除いて同じです。
imagearc(GDImage, center_x, center_y, width, height, start_deg, end_deg, color);
imagefilledarc(GDImage, center_x, center_y, width, height, start_deg, end_deg, color, style);
引数に渡す値は円の中心の座標、幅、高さ、弧の開始位置と終了位置です。
start_degに0を渡すと3時の方向から時計回りにend_degまでの弧を描画します。
imagearc関数で弧を描画するとこのようになります。
$image = imagecreate(200, 200);

imagecolorallocate($image, 255, 255, 255);
$red = imagecolorallocate($image, 255, 0, 0);

imagearc($image, 100, 100, 200, 200, 0, 90, $red);

header("Content-Type: image/png");

imagepng($image);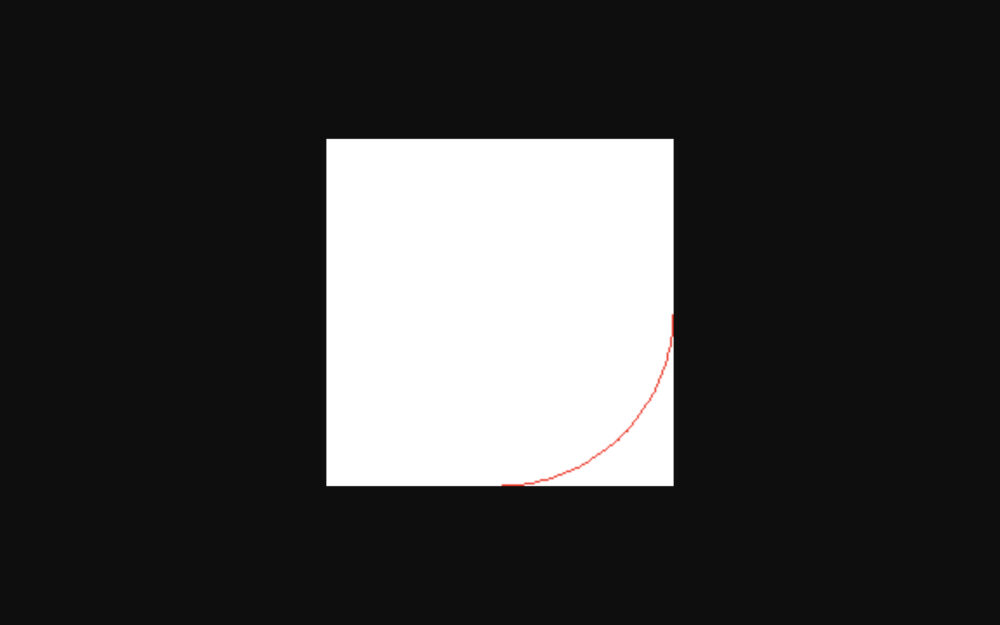
imagefilledarc関数は引数の最後に描画するstyleを渡します。
styleにはIMG_ARC_PIE、IMG_ARC_CHORD、IMG_ARC_NOFILL、IMG_ARC_EDGEDのいずれかの値を渡します。
$image = imagecreate(200, 200);

imagecolorallocate($image, 255, 255, 255);
$red = imagecolorallocate($image, 255, 0, 0);

imagefilledarc($image, 100, 100, 200, 200, 0, 90, $red, IMG_ARC_PIE);

header("Content-Type: image/png");

imagepng($image);
楕円を描画する
楕円を描画するにはimageellipse関数かimagefilledellipse関数を使用します。
引数に渡せる値は同じです。
iamgeellipse(GDImage, center_x, center_y, width, height, color);
imagefilledellipse(GDImage, center_x, center_y, width, height, color);
center_xとcenter_yには中心の座標、widthとheightにはそれぞれ幅と高さを渡してください。
imagearc関数でも楕円を描画することができますが、コードを見直した時の観点から考えると描画する図形に合わせた関数を使用するのが望ましいです。
$image = imagecreate(200, 200);

imagecolorallocate($image, 255, 255, 255);
$red = imagecolorallocate($image, 255, 0, 0);

imageellipse($image, 100, 100, 200, 100, $red);

header("Content-Type: image/png");

imagepng($image);
imagefilledellipse関数を使用するとこのようになります。
$image = imagecreate(200, 200);

imagecolorallocate($image, 255, 255, 255);
$red = imagecolorallocate($image, 255, 0, 0);

imagefilledellipse($image, 100, 100, 200, 100, $red);

header("Content-Type: image/png");

imagepng($image);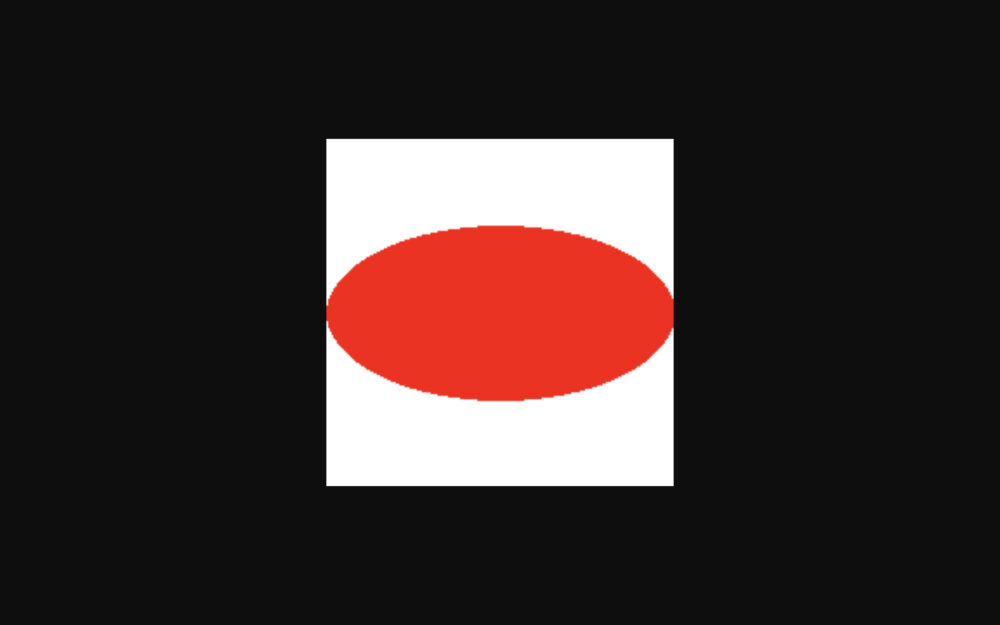
画像の回転
画像を回転させるにはimagerotate関数を使用します。
この関数は描画した図形だけを回転させるのではなく、画像そのものを回転させます。
imagerotate($GDImage, deg, color);degに回転させる角度を渡します。
PHPで画像を作成すると、アートボードの上にimagecreate関数指定したサイズの画像が重なっているようなイメージになります。
例えば、imagecreate関数で幅200、縦200の画像を作成するとアートボードのサイズも幅200、縦200のようになるようです。
画像を常に覆えるようにアートボードのサイズが変動してくれるみたいです。
画像を回転させるとアートボードと画像の重なり合って内部部分が生じます。
この時の色を第三引数のcolorに渡します。
この関数の返り値を画像出力関数(imagepng関数など)に渡さないとWeb上の画像は回転していないので注意が必要です。
imagerotate関数で画像を回転させるとこのようになります。
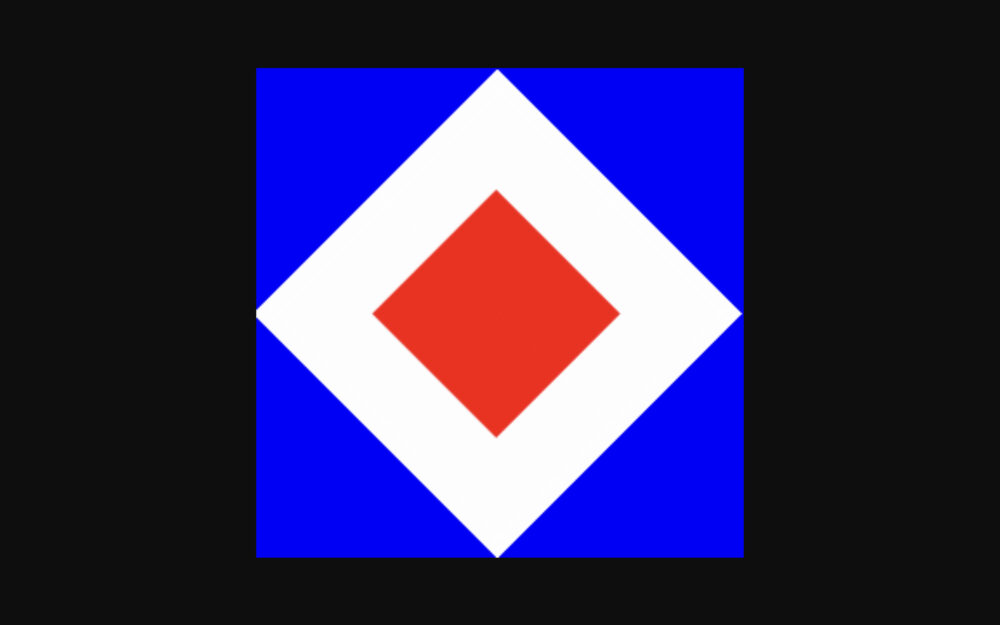
$image = imagecreate(200, 200);

imagecolorallocate($image, 255, 255, 255);
$red = imagecolorallocate($image, 255, 0, 0);
$blue = imagecolorallocate($image, 0, 0, 255);

imagefilledrectangle($image, 50, 50, 150, 150, $red);

$rotate = imagerotate($image, 45, $blue, true);

header("Content-Type: image/png");

imagepng($rotate);